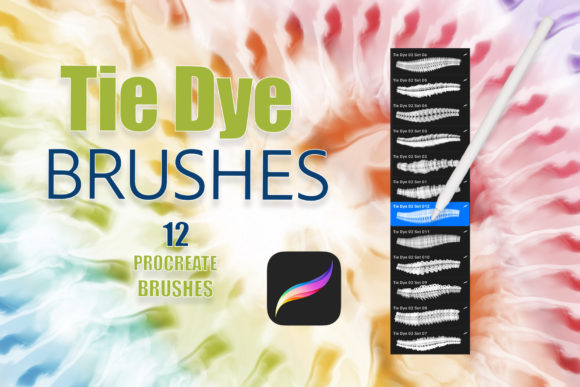
Mastering Procreate Realistic Tie Dye Brushes Vol6 for Professional Digital Art
Digital tie-dye has evolved from a niche trend into a versatile design element used across industries, from streetwear branding to wedding invitations. However, achieving that authentic, fluid look on an iPad requires more than just standard smudge tools or generic watercolor brushes. This is where specialized tools like Procreate Realistic Tie Dye Brushes Vol6 come into play. Designed specifically for the Procreate ecosystem, this brush set offers a streamlined workflow for creators who want high-quality, organic textures without the mess of physical dyes.
While the promise of instant, professional-grade tie-dye effects is appealing, many users encounter friction when integrating new brush sets into their existing workflow. Whether you are a seasoned illustrator, a small business owner creating custom merchandise, or a hobbyist exploring digital art, understanding the nuances of these tools is essential. Missteps in setup or application can lead to flat, unconvincing results that fail to capture the chaotic beauty of real dye diffusion.
Understanding Compatibility and Hardware Requirements
The most common oversight when purchasing digital assets is ignoring technical specifications. Procreate Realistic Tie Dye Brushes Vol6 is exclusively compatible with the Procreate app on iPad. It will not work with Procreate Pocket on iPhone, nor will it function in desktop software like Photoshop or Illustrator. This limitation is not a drawback but a specialization; the brushes are engineered to leverage Procreate’s specific rendering engine and Apple Pencil pressure sensitivity.
To get the most out of this set, you need an iPad paired with an Apple Pencil or a third-party stylus that supports robust pressure sensitivity. Without pressure data, the brushes cannot vary their opacity or spread dynamically, resulting in uniform, stamp-like appearances rather than fluid, organic flows. Many beginners mistakenly blame the brush quality when the issue lies in their hardware setup. Before downloading, ensure your device meets these requirements to avoid frustration and wasted investment.
Avoiding the "One-Click" Mindset
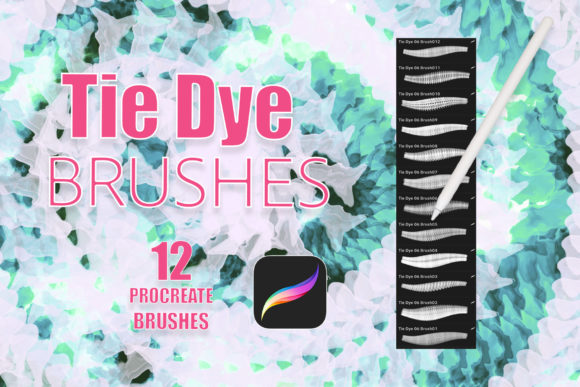
A frequent misunderstanding among new users is the expectation that these brushes will generate a complete, finished design with a single stroke. While Procreate Realistic Tie Dye Brushes Vol6 provides realistic textures, it is a tool, not a magic wand. The set includes 12 distinct brushes, each designed to mimic different aspects of the tie-dye process, such as bleeding, pooling, and sharp edges. Relying on a single brush for an entire piece often leads to repetitive patterns that lack depth.
For example, using only the broad bleed brush might create a nice background, but it won’t provide the intricate details needed for a logo or a focal point in a tattoo design. The better approach is to layer multiple brushes from the set. Start with a base layer using a softer brush to establish color fields, then overlay sharper, more defined brushes to add contrast and visual interest. This layering technique mimics the way real dye interacts with fabric folds, creating a more convincing final image.
The Importance of Transparent Backgrounds and Layer Management
One of the standout features of this brush set is that all strokes render with transparent backgrounds. This allows for seamless integration with other textures, colors, and patterns. However, this flexibility can be overwhelming for users unfamiliar with layer management in Procreate. A common mistake is applying all colors on a single layer, which makes editing impossible without starting over.
To maintain efficiency and quality, adopt a non-destructive workflow. Create separate layers for each color variant. This method allows you to adjust the opacity, blending mode, or position of individual colors without affecting the rest of the design. For instance, if you are designing a greeting card, you might want the blue dye to blend softly with the paper texture while keeping the red dye vibrant and distinct. By isolating these elements on different layers, you gain precise control over the final composition.
Choosing the Right Application for Your Project
These brushes are marketed for a wide range of uses, including tattoos, invitations, greeting cards, and logos. However, each application has unique requirements regarding resolution and complexity. A mistake many freelancers make is using the same brush settings for a small social media graphic and a large-format print invitation. What looks detailed on a phone screen may appear pixelated or muddy when printed.
When working on print materials like invitations or packaging, always set your canvas DPI to 300 or higher. Test your brush strokes at actual size to ensure the details hold up. For digital-only uses, such as logos for websites, you can prioritize file size and loading speed, but still ensure the vectors or high-resolution exports remain crisp. Understanding the end-use of your art helps you choose the right brush from the Procreate Realistic Tie Dye Brushes Vol6 set and adjust your canvas settings accordingly.
Customization and Color Theory
While the brushes provide the texture, the color palette determines the mood and effectiveness of the design. A prevalent error is selecting clashing colors without considering how they will blend. In real tie-dye, certain color combinations create muddy browns or grays when they overlap. The same principle applies digitally. If you place complementary colors directly on top of each other using these brushes, you may lose vibrancy.
To avoid this, use Procreate’s color harmony tools to select analogous or triadic schemes that blend pleasingly. Additionally, take advantage of the transparent nature of the brushes to experiment with blending modes. Setting a layer to "Multiply" or "Overlay" can change how colors interact, offering effects that mimic the saturation levels of real fabric dye. This level of customization transforms a simple brush stroke into a sophisticated design element.
Evaluating Value and Usability
Before committing to any digital asset, it is wise to evaluate its fit within your current toolkit. Procreate Realistic Tie Dye Brushes Vol6 comes as a single .brushset file inside a zip archive. Some users struggle with installation, expecting individual PNG files or complex folders. Remember that installing a .brushset file in Procreate is straightforward: simply tap the file in your Files app, and it will automatically import into your brush library.
Consider your long-term needs. If you frequently create bohemian-style graphics, summer-themed promotions, or psychedelic art, this set offers significant time savings compared to creating these textures manually. However, if your work is primarily geometric or minimalist, the utility may be limited. Assessing your project pipeline helps determine whether this investment will enhance your productivity or sit unused.
In conclusion, Procreate Realistic Tie Dye Brushes Vol6 is a powerful resource for digital artists seeking authentic, organic textures. By respecting hardware requirements, adopting layered workflows, and applying thoughtful color theory, you can avoid common pitfalls and elevate your designs. Whether you are crafting a logo for a startup or a personalized invitation, these brushes provide the flexibility and realism needed to stand out in a crowded digital landscape.